What Is Scene-by-Scene Prompting?
Scene-by-scene prompting is the technique of writing a series of connected AI image prompts that tell a coherent visual story. Each prompt builds on the previous one - sharing the same character, progressing the environment, and advancing the emotional arc. It is the difference between random AI images and a professional visual narrative.
Think of each prompt as a screenplay direction for a single frame. When done well, the resulting images flow together like stills from a film. This guide teaches you exactly how to write these connected prompts, based on the techniques we use for our own AI visual stories.
Planning Your Scene List
How Many Scenes?
The number of scenes depends on your format and story complexity. A simple TikTok story needs 8-12 scenes. A web-based story works well with 15-25. A full graphic novel chapter might use 30-40. Start with the minimum scenes needed to tell the story - you can always add more.
Scene Pacing
Not every scene should be the same intensity. Great stories alternate between three types of beats:
- Action beats: Something happens - movement, conflict, discovery. Wide or dynamic camera angles. 2-3 seconds per image when converted to video
- Emotional beats: Character reacts - close-ups on face, expression keywords, intimate lighting. 3-4 seconds to let emotion land
- Transition beats: Scene changes - establishing shots of new locations, time-of-day shifts, environmental storytelling. 2 seconds to orient the viewer
Writing Scene Prompts That Connect
Identical Character Descriptions
The character description prefix must be identical in every single prompt. Copy and paste it - do not retype it or paraphrase it. Even small changes like "brown hair" vs "dark brown hair" can cause the AI to generate different-looking characters. For full character consistency techniques, see our character consistency guide.
Environment Transitions
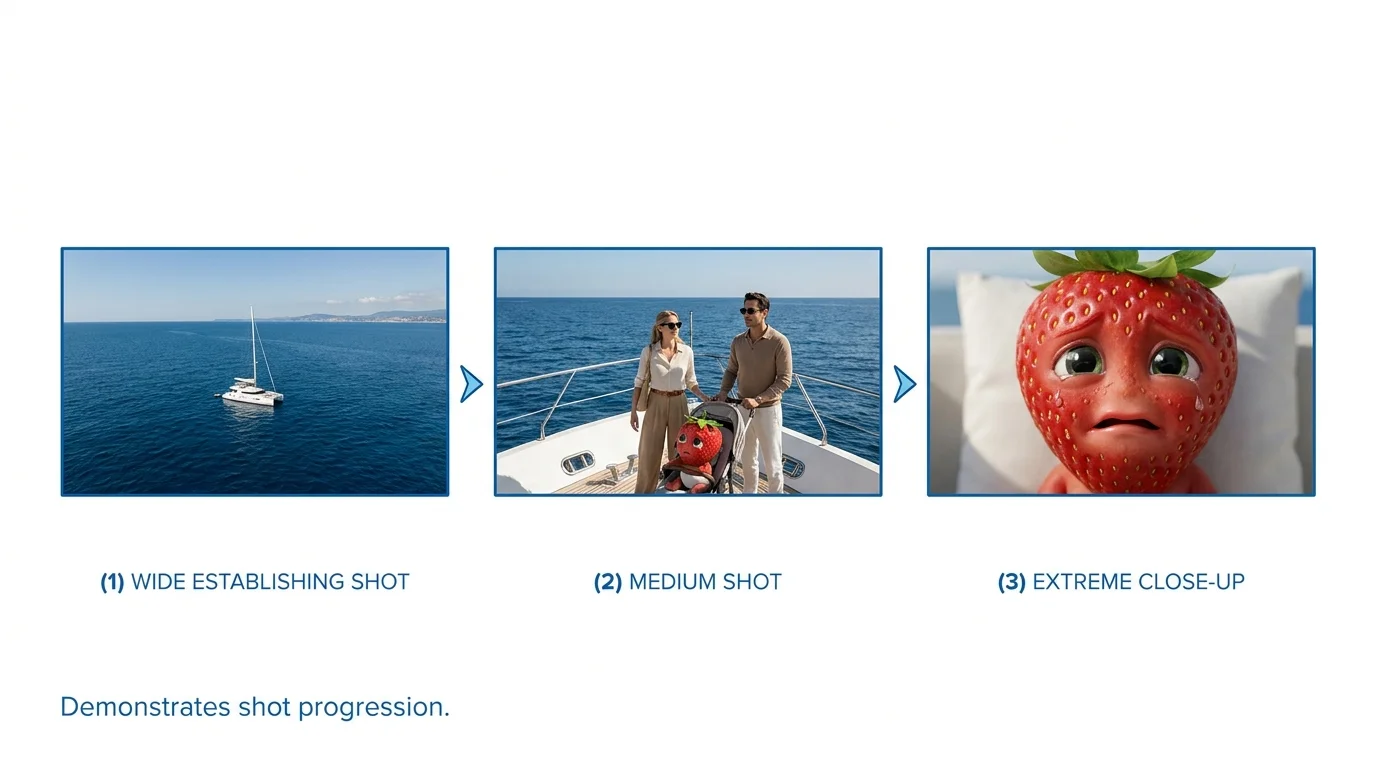
When moving between locations, make the transition feel natural. Do not jump from a cozy bedroom to a dark forest with no connection. Instead, show the character leaving (medium shot at doorway), traveling (wide shot of path), and arriving (establishing shot of new location). Three transition scenes make any location change smooth.
Time-of-Day Progression
Use lighting to show time passing. Morning scenes use "soft golden sunrise light, cool blue shadows." Midday uses "overhead bright sunlight, sharp shadows." Evening uses "warm golden hour, long shadows, amber tones." Night uses "moonlight, cool blue tones, artificial light sources." Consistent time-of-day changes make your story world feel real.
Emotional Arc Through Expressions
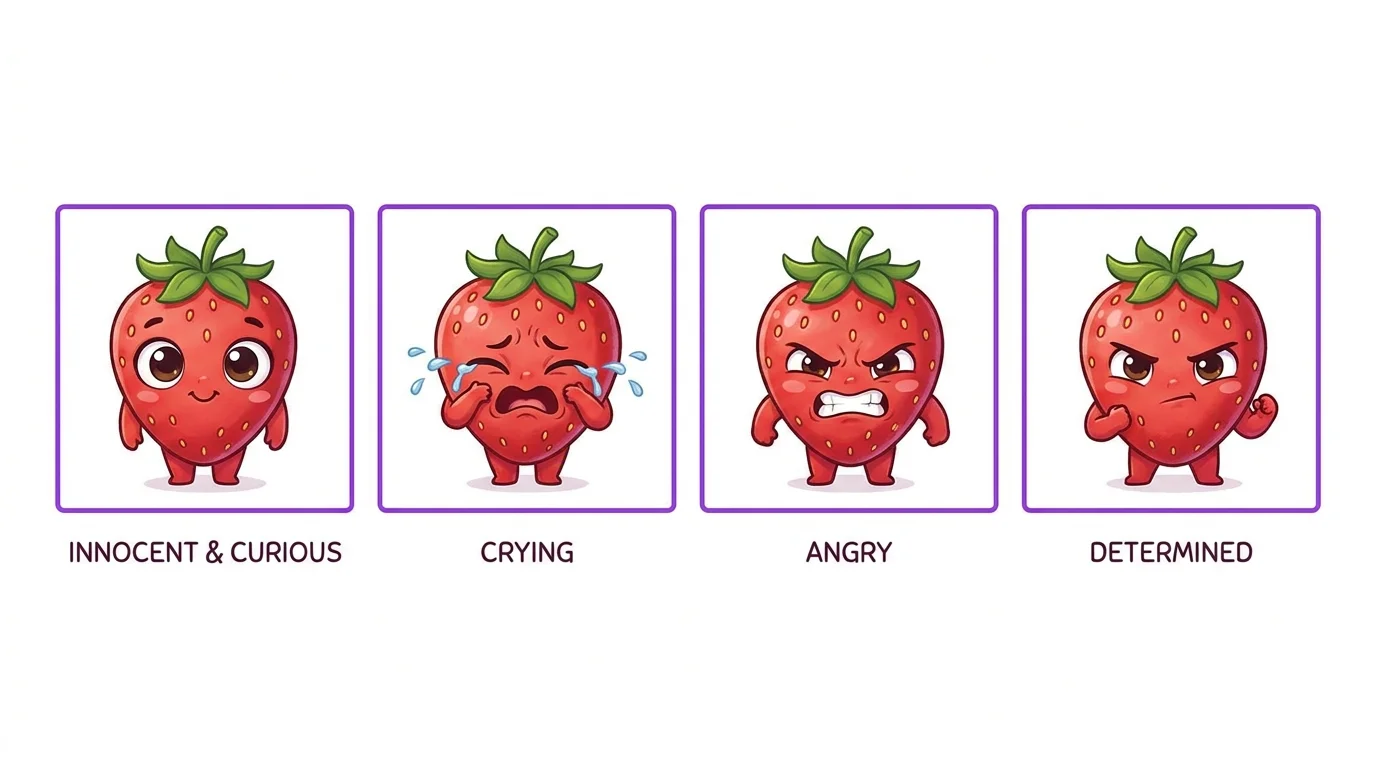
Your character's emotional state should evolve across scenes. Map out the emotional journey: curious > excited > worried > terrified > relieved. Each scene prompt changes only the expression and body language keywords while keeping everything else constant.
Expression keywords to master:
- Joy: wide genuine smile, crinkled eyes, raised cheeks, relaxed posture
- Fear: wide eyes, raised eyebrows, mouth slightly open, tense shoulders, leaning back
- Anger: furrowed brows, clenched jaw, narrowed eyes, rigid posture, fists clenched
- Sadness: downcast eyes, slightly pursed lips, slumped shoulders, head tilted down
- Surprise: raised eyebrows, wide open eyes, open mouth, leaning forward
Prompt Template per Scene Type
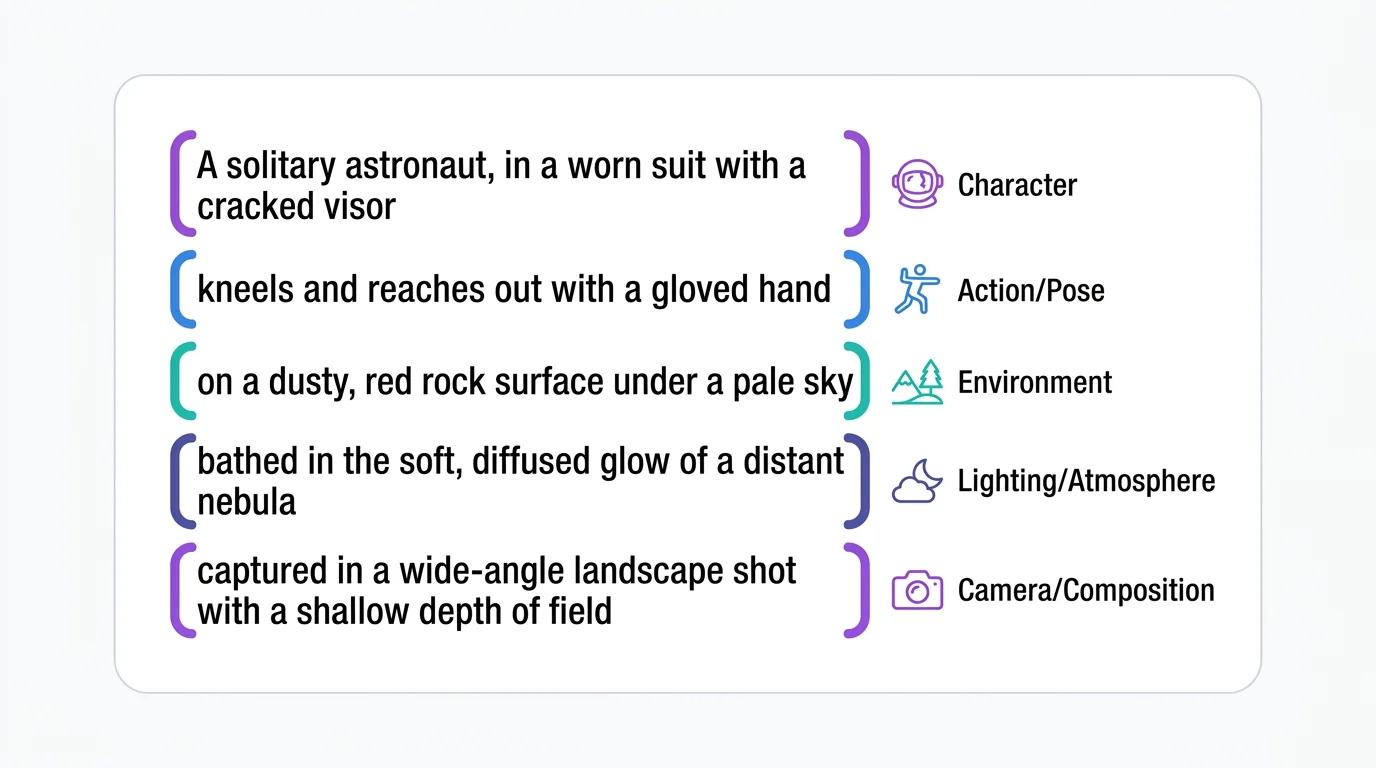
Establishing Shot
Dialogue and Interaction
Action Scene
Emotional Close-Up
Climax and Reveal
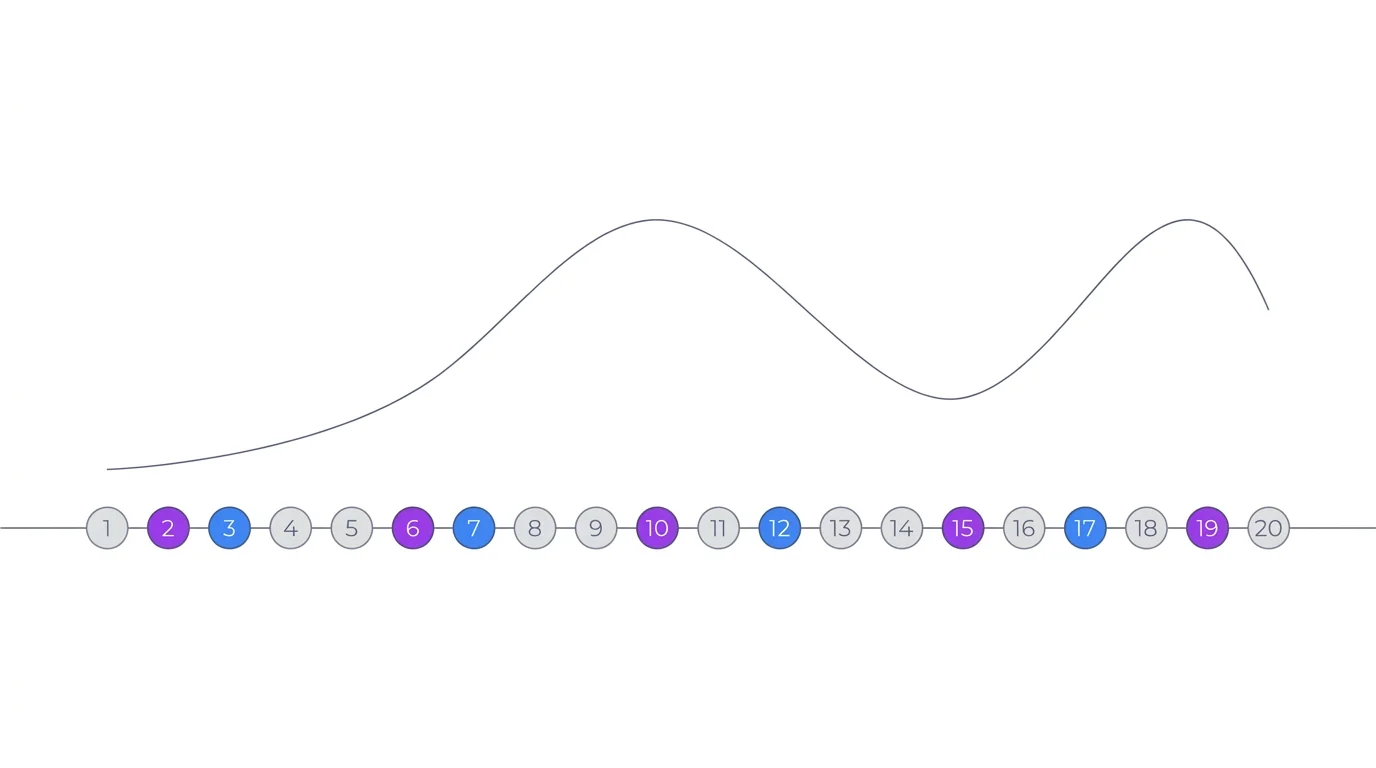
Real Example: Breaking Down a 20-Scene Story
Here is how a complete story breaks down using these techniques. This is the structure we used for our story "Pushed Overboard":
- Scenes 1-3 (Setup): Wide establishing shots of the location, medium shots introducing the characters, warm friendly lighting. Expressions: relaxed, happy.
- Scenes 4-6 (Rising tension): Medium shots showing growing conflict, lighting becomes more dramatic, expressions shift to concerned and suspicious. Camera angles tighten.
- Scenes 7-9 (Escalation): Dynamic angles, dramatic lighting, intense expressions. Action beats mixed with emotional close-ups.
- Scenes 10-12 (Climax): Most dramatic camera angles, peak lighting contrast, extreme expressions. This is where all the tension pays off.
- Scenes 13-15 (Aftermath): Camera pulls back to wider shots, lighting softens but stays tense, expressions show shock and processing.
- Scenes 16-20 (Resolution): Gradual return to calmer composition, lighting reflects the new emotional state, expressions show transformation.
Free Scene Prompt Templates
Download our character prefix template and scene prompt templates from the character consistency guide and combine them with the scene type templates above. The formula is always: Character Prefix + Action + Expression + Environment + Camera + Lighting + Style + Quality.